The teacher can add users (students) to his/ her course. The system also allows you to modify users’ details or delete (unsubscribe) them from the course.
To work with the list of course users:
1. Enter the necessary course and click the Learners and Groups icon in the left course menu. The system will display a list of available user groups
2. Choose the required user group from the list and click its name
3. The list of users belonging to the chosen group will appear:
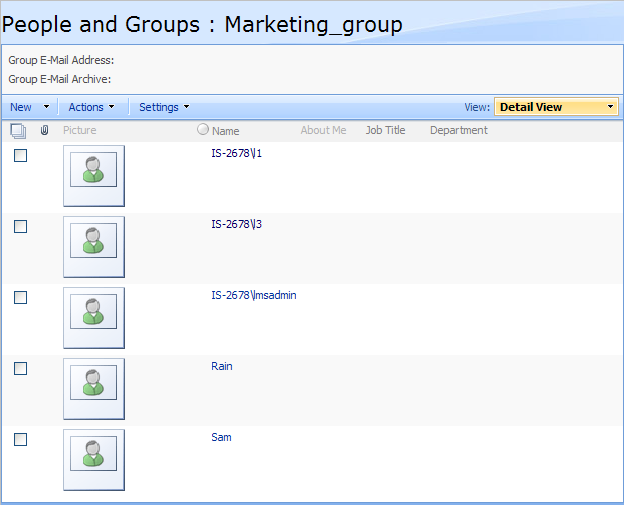
Fig. ‘List of Users’
|
TIP: |
For better representation, you can modify the list view. From the View list select the necessary view (Detail View or List View depending on how you want to view the info).
Column names at the top of the list are clickable and allow you to sort documents in ascending or descending order: h. Use the Name link to sort documents alphabetically by name; i. Use the Job Title link to sort or filter job titles; j. Use the Department links to sort or filter departments of users; k. To remove filter criteria, click the necessary link in the column head and select Clear filter from option from the context menu. |
To add a new user to the group:
1. Enter the necessary course and click the Learners and Groups icon in the left course menu. The system will display a list of available user groups.
2. Click the down arrow of the New button in the header of the page and select Add Users to create a new user. The system will display the following form:
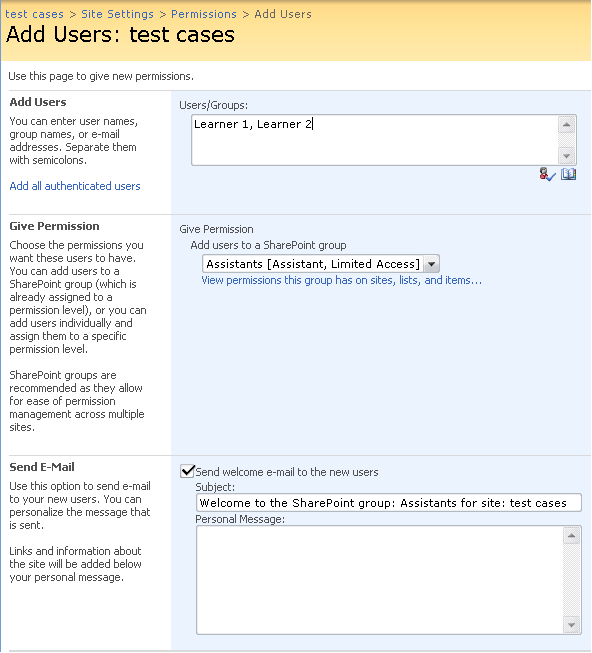
Fig. ‘Adding a New User’
3. Fill out the form fields as described below:
- Add Users – enter user names, group names, or e-mail addresses of users you want to add. Separate them with semicolons;
- Give Permission – choose the permissions you want these users to have.
- Send E-mail – the option allows to send an e-mail to welcome new users.
Press Ok to add users; press Cancel to discard changes.
25.2.2 Viewing Group Membership
To view and work with members of a certain user group:
1. Enter the necessary course.
2. Click the Learners and Groups link in the left course menu. The list of available user groups will be shown in the main workspace area.
3. Click the required group name. The system will open the list of users belonging to the group:
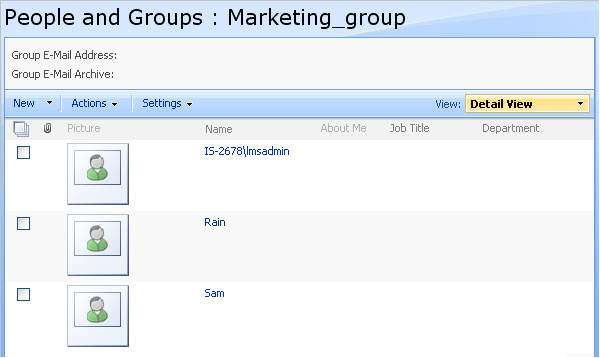
Fig. ‘List of Users’
To manage user’s details or perform a certain action, click his/ her name in the list or select the necessary users and choose the appropriate action from the top menu.
|
TIP: |
For better representation, you can modify the list view. From the View list select the required view organization: Detailed View or List View.
Column names at the top of the list are clickable and allow you to sort users in ascending or descending order: l. Use the Attachment, Name, Job Title or Department links to sort or filter users by corresponding criteria; m. Use the About Me link to sort users by description; n. To remove filter criteria, click the necessary link in the column head and select Clear filter from option from the context menu. |
25.2.3 Managing Users’ Information
To manage users’ information:
1. Enter the necessary course and click the Users & Group Management icon in the left course menu. The system will display a list of available user groups.
2. Choose the required user group from the list and click its name.
3. Select View. The list of users belonging to the chosen group will appear.
4. Click the necessary user’s name. The following form with user’s information will be displayed:
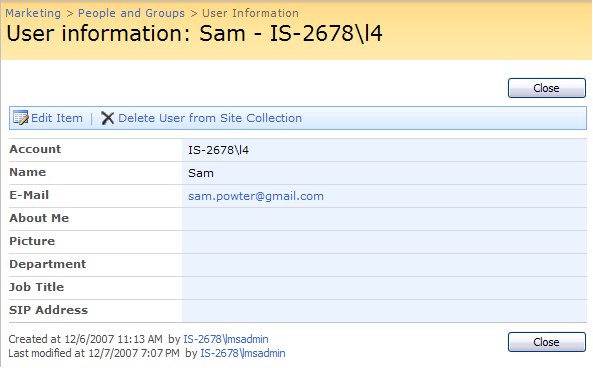
Fig. ‘User’s Information’
5. To edit user’s information press the Edit Item ( ) button. The following form will be opened:
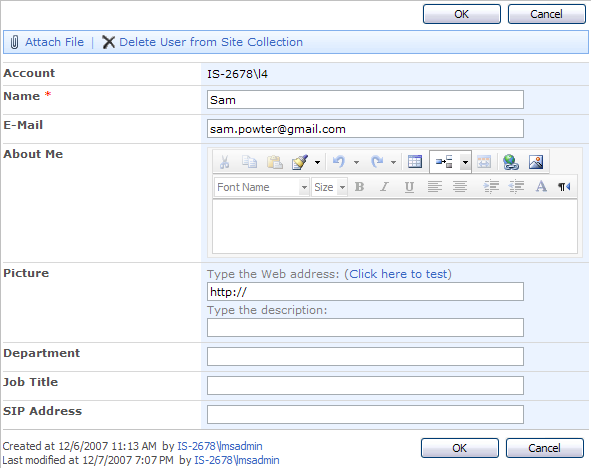
Fig. Editing User’s Information’
6. Fill out the form fields as described below:
- Name – enter the name of user;
- E-mal – enter the email address of the user;
- About Me – if needed enter the personal information of the user;
- Picture – type the Web address of the image (click the link in brackets to test the picture) and type the description of the picture if necessary;
- Department – enter the department a user belongs to;
- Job Title – enter the job a user occupies;
- SIP Address – enter user’s SIP address (SIP stands for Session Initiation Protocol, and is one of many ways to do Voice over the Internet Protocol, but its applications reach far beyond mere Voice)
|
NOTE: |
The above mentioned option relates to SharePoint functionality. Should you encounter any difficulties using the option, see http://blah.winsmarts.com/2007-7-SharePoint_2007__All_you_ever_wanted_to_know_about_User_Profiles.aspx.
If you have SSP (Shared Service provider) installed the profile synchronization timer job synchronizes all users info which makes it impossible for the administrator to maintain user’s profile via userdisp.aspx, i.e. by clicking on user’s name and editing him/her. For more information, refer to the link provided above.
|
Press the Ok button to save the changes.
7. To delete a user press Delete User from Site Collection in the header of the form.
If MySite option is enabled user’s site will appear instead of the form specified above:

Fig. MySite
To perform operations with several users at once,
1. Navigate to the list of users and select the necessary users with the help of check boxes to the left of each user.
2. At the top of the list click Actions and choose any of the following options from the context menu:
§ E-mail Users to send an e-mail message to the selected users (the system will launch Outlook and create a new message automatically). Note that the message can be sent only to those users for whom e-mail addresses are specified.
§ Call/ Message Selected Users to call selected users. Note that this action can be performed only for those users, for whom SIP addresses are specified.
§ Remove Users from Group to remove selected users from the user group.
§ Leave Group to remove yourself from the group.
§ Join Group to join the group. Note that the process of leaving and joining the group by members depends on the group settings (membership requests).