When users change pages and controls, it is possible to save settings for user's personal preferences to display in future browser sessions.
To modify any Web Part displayed on the page click the down arrow next to the Web Part’s title. This will open the Web Part’s menu:
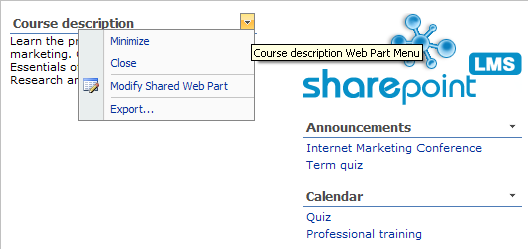
Fig. ‘Web Part’s menu’
- Press Minimize (or Restore) to hide (show) Web Part’s content;
- Press Close to remove the Web Part from the page;
- Press Export and select the location for storage if you want to export a Web Part to a local machine;
- Press Modify Shared Web Part to enter the Edit Mode.
Once the Edit Mode is opened you can perform the following operations:
To add a Web Part, click Add a Web Part at the top of required column in the Edit Mode (go to Site Actions > Edit Page).
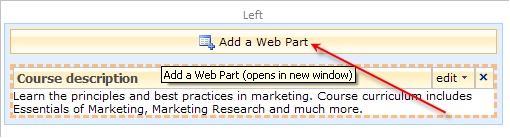
Fig. ‘Adding a new Web Part’
A new window will open. Select the check boxes near the items you want to add as Web Part, and then click Add.
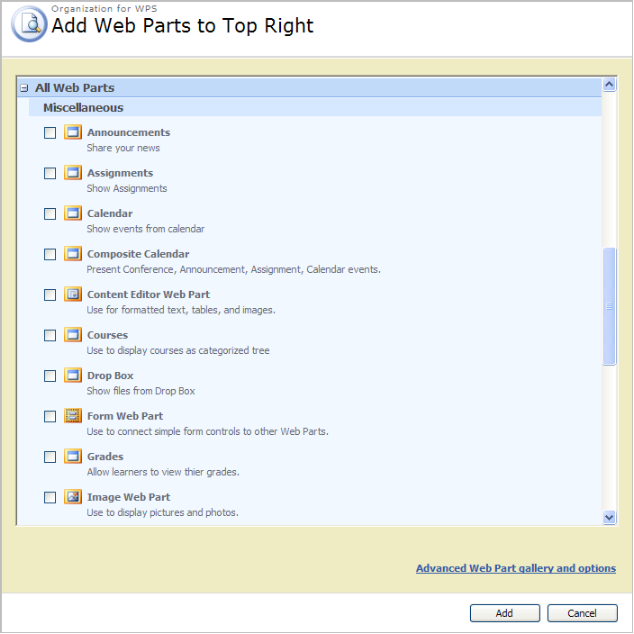
Fig. Web Parts List
To add a totally customizable Web Part, select the item named Content Editor Web Part.
|
Note: |
Not all the Web Parts are available in the list by default. To add required Web Part go to Site Action > Site Settings > Site Features in the Site Administration section and press Activate to add needed Web Part to the list. |
To edit the added Web Part, click the down arrow next to the Edit button, and then select Modify Shared Web Part.

Fig. ‘Editing a New Web Part’
The editor will be opened in the right part of the page displaying slightly different options depending on the selected type of the Web Part, for example:
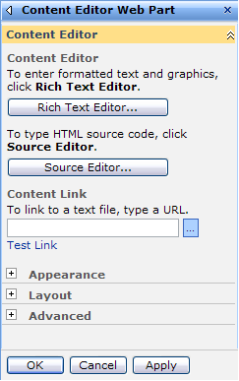
Fig. ‘The editor of the Web Part’
Press Ok or Apply to save the changes. The Edit button also allows to Minimize (Restore), Close, Delete and Export a Web Part. The cross button in the top right corner of the part’s form removes the Web Part.
Web parts
· My Grades
· Announcements
· Calendar
· Composite Calendar
· Drop Box
· Assignments
have the Web Application URL and Display Mode fields (Modify Shared Web Part -> Miscellaneous -> Display Mode):
· Default – the web part displays data from the current course. If there is no current course it displays data from the current organization courses. If there is no current organization the available data is displayed.
· Current Courses – the web part displays data from the current course. If there is no current course it displays data as if the Default option is selected.
· Current Organization – the web part displays data from the current organization courses (the current user must have access to these courses). If there is no current organization the available data is displayed.
· Current Organization with Children – the web part displays data from courses of all current organization's children, including the current organization courses. If there is no current organization the available data is displayed.
· All – the web part displays data from the web application specified in the Web Application URL field
To exit the Web Part edit mode, press the link Exit Edit Mode in the top right corner of the page.