When the user opens the list of section items (for example, list of announcements or documents and folders), the system displays the Actions button with a set of applicable action options in the drop-down context menu. Note that the set of actions varies depending on the type of items (that is, for announcements you may have one set of applicable actions, while for mailbox items the list will be different).
In general, LMS system uses the following SharePoint actions:
· Alert Me
Find below a detailed description of each action applicable.
Connecting to client (Outlook) is used for items in the Calendar section. When performing this action for calendar events published online, you transfer them to your Outlook calendar.
To synchronize events:
1. Enter the necessary course and open the Calendar section.
2. In the top menu click Actions and select Connect to Client (Outlook) from the context menu.
The system will launch your Outlook and will copy all events from the LMS calendar into the Outlook calendar. All specified event settings will be kept. Note that if you perform this action for different courses, the Outlook will create several calendars – one for a separate course.
Editing in datasheet allows managing and modifying list items in an Excel-like environment.
To do modifications in Datasheet:
1. Enter the necessary course and open the required section to display the list of items that you want to edit (for example, documents).
2. In the top menu click Actions and select Edit in Datasheet from the context menu.
The system will switch to the datasheet mode to display the contents of a list or a document library in a grid of rows and columns. The Actions columns will show additional operations applicable to the datasheet mode (show in standard view, new row, task pane, totals and refresh data). Data in the list are edited right on the datasheet pane:
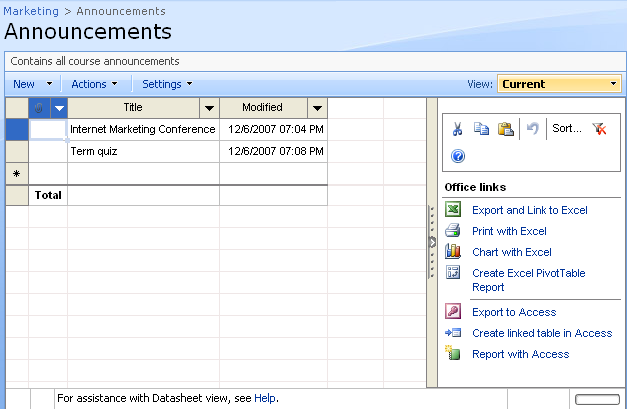
Fig. ‘Datasheet View’
|
NOTE: |
To open a list in datasheet view, you must meet the following requirements: § Install Microsoft Office Professional Edition 2003 on your computer. § Install the Microsoft Office List Datasheet Component that is included with Office 2003 on your computer. This component is installed by default when you install Office 2003. § Use Microsoft Internet Explorer 5.01 with Service Pack 2 (SP2) or later to open the list. § Make sure security settings in the browser support Microsoft ActiveX controls. |
If more information is needed on working with the SharePoint Datasheet, click the Help link at the bottom of the page.
31.1.3 Open with Windows Explorer
This action is used for library sections (for example, Documents). To open the list of documents in a new Windows Explorer window:
1. Enter the necessary course and open the required section to display the list of library items (for example, documents).
2. In the top menu click Actions and select Open with Windows Explorer from the context menu.
The system will open the list of library documents in a new Windows Explorer window. Drag and drop files and folders onto the window workspace to copy them to the online library:
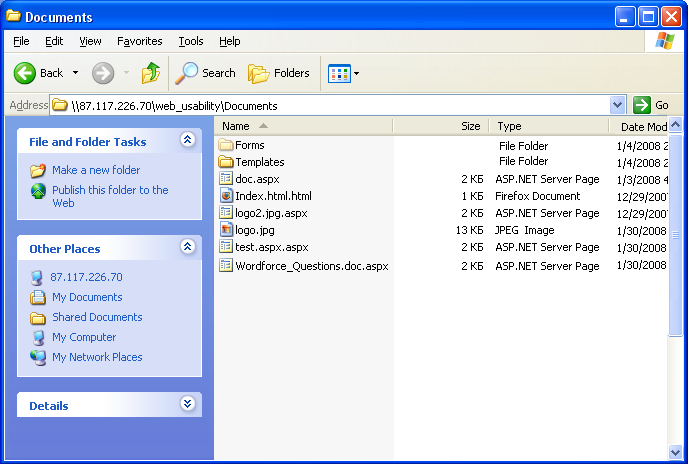
Fig. ‘Open in Windows Explorer’
If necessary, you can export the list of items into an Excel file:
1. Enter the necessary course and open the required section to display the list of items to be exported (for example, announcements).
2. In the top menu click Actions and select Export to Spreadsheet from the context menu.
The system will open a standard opening dialog box allowing you to choose whether to open or save the file on your computer.
To be aware of the latest changes to lists and libraries in the system, you may view or subscribe to RSS feed and receive updates:
1. Enter the necessary course and open the required section to display the list of items (for example, list of forum discussion posts or announcements).
2. In the top menu click Actions and select View RSS Feed from the context menu.
The system will open a form with the list of latest updates (the list and representation of items in the list depends on RSS settings).
If necessary, subscribe to the RSS feed.
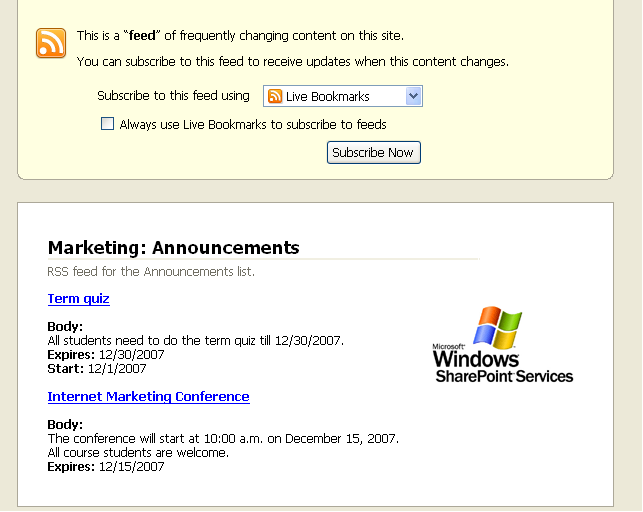
Fig. ‘RSS Feed’
31.1.6 Change RSS Feed Settings
The system allows you to modify RSS settings for certain libraries or lists of items:
1. Enter the necessary course and open the required section to display the list of items (for example, list of forum discussion posts or announcements).
2. In the top menu click Settings and select List Settings from the context menu.
3. On the displayed page click the RSS Settings link in the Communications section. The system will open an RSS settings form.
4. Change the settings in the form fields (to open a SharePoint help, click the Learn how to enable and configure RSS link at the top of the form).
5. When finished, click OK at the bottom of the form to apply modifications; click Cancel to discard changes and close the form. If you want to restore default RSS settings, click the Defaults button.
Use the Alert Me action to create an e-mail alert notifying you when changes are made to the specified item, document, list, or library:
1. Enter the necessary course and open the required section to display the list of items (for example, list of forum discussion posts or announcements).
2. In the top menu click Actions and select Alert Me from the context menu. The following form will be opened:
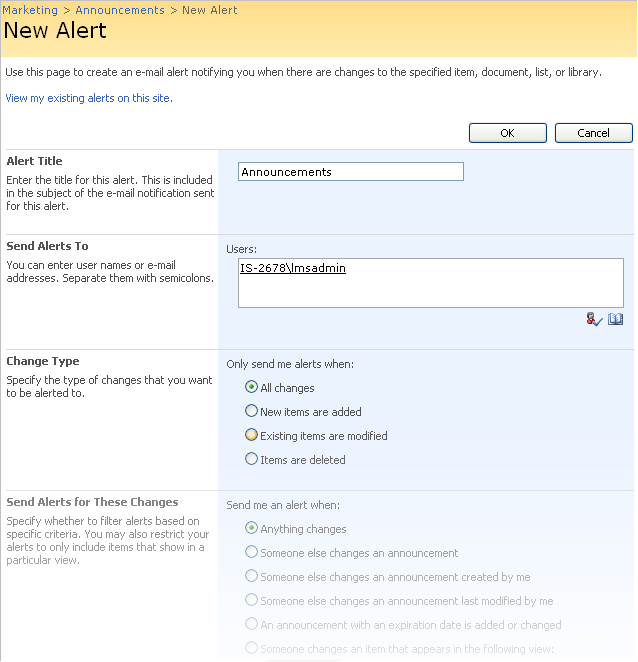
Fig. ‘Adding an Alert’
3. Change the alert settings in the form.
4. When finished, click OK at the bottom of the form to add the alert; click Cancel to discard changes and close the form.
If you want to view the list of already existing alerts, click the View my existing alerts on this site link (refer to standard SharePoint Services 3.0 help documentation for details).
The option allows changing the order of list items.
To change the order,
1. Enter the necessary course and open the required section to display the list of items (e.g. Links).
2. In the top menu click Actions and select Change Order from the context menu. The following form will be opened:
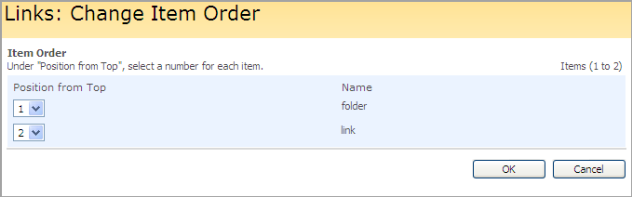
Fig. Changing Order
3. Select the position for every list item and click OK.
|
NOTE: |
In the Links tool folders and links are ordered separately. |
To create a quick link to a certain list or library, you can add a kind of bookmark and assign it to the list of your favorite links (the list of links will be displayed at the top of the page):
1. Enter the necessary course and open the required section to display the list of items (for example, list of forum discussion posts or announcements).
2. In the top menu click Actions and select Add to My Links from the context menu.
|
NOTE: |
This feature is available for Microsoft Office SharePoint Server |