When the user opens the list of section items (for example, list of announcements or documents and folders), the system displays the Settings button intended to manage list settings (modify columns, view and change permissions, etc.).
In general, the Settings context menu contains links to the following sections:
§ Create View;
Find below a detailed description of each section.
Use the Create Column menu option to add a new column to a list, or library (note that creating a column means adding a new column to the list and adding a new field to the form that is used to create or edit items in the list).
To add a new column (field),
1. Enter the necessary course and open the required section to display the list of items (for example, list of forum discussion posts or announcements).
2. In the top menu click Settings and select Create Column from the context menu. The following form will be opened:
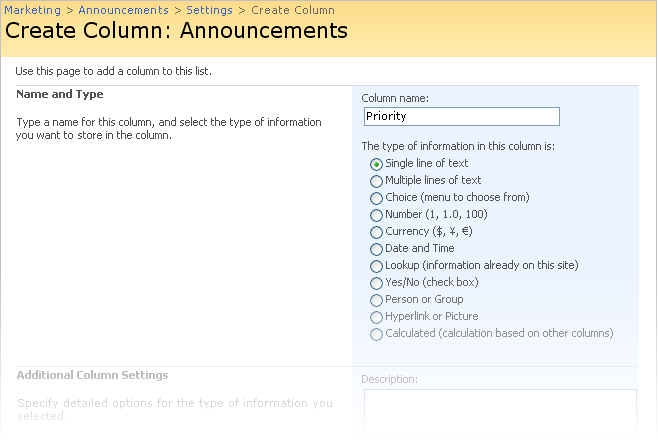
Fig. ‘Creating a Column’
3. Specify column properties in the form fields.
4. When finished, click OK at the bottom of the form to add the column; click Cancel to discard changes and close the form.
Newly created column will be added to the list of items; a corresponding field will be added to the New Item form.
SharePoint services in the system allow not only customizing existing lists, but creating new views for lists. View is a variant of a list or table that organizes item details in a certain predefined way. Along with the visual representation of items, the view may define additional criteria, like filter and sorting rules, availability to users, etc.
If the list presupposes existence of several views, the user can select the appropriate one from the View list in the top right corner:
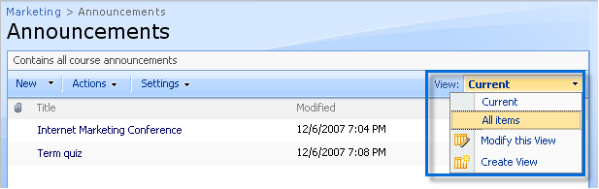
Fig. ‘Selecting Views’
To create a new view for a list or library:
1. Enter the necessary course and open the required section to display the list of items (for example, list of forum discussion posts or announcements).
2. In the top menu click Settings and select Create View from the context menu (as an option, you can open the View list and select Create View from the context menu). The system will display a set of available view types:
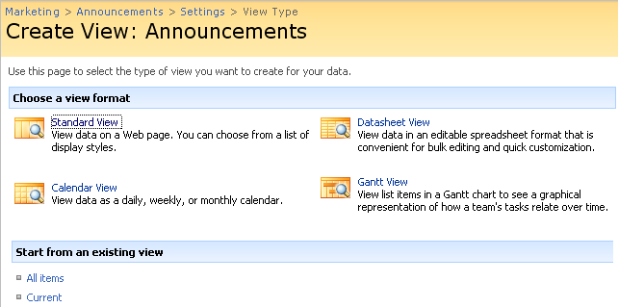
Fig. ‘Choosing a View Type’
3. Choose the most appropriate type from the list and click its name link (if you want to create a view on the basis of the existing one, click the necessary view name in the Start from an existing view section). The system will open a view form:
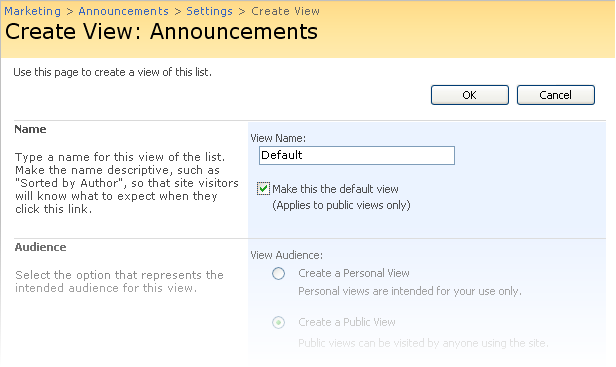
Fig. ‘Creating a View’
4. Specify view properties in the form fields.
5. When finished, click OK at the bottom of the form to add the view; click Cancel to discard changes and close the form.
Newly created view will be added to the list of view options.
If needed, you can customize the list or library settings:
1. Enter the necessary course and open the required section to display the list of items (for example, list of forum discussion posts or announcements).
2. In the top menu click Settings and select List Settings (Library Settings) from the context menu. The system will open the Settings page:
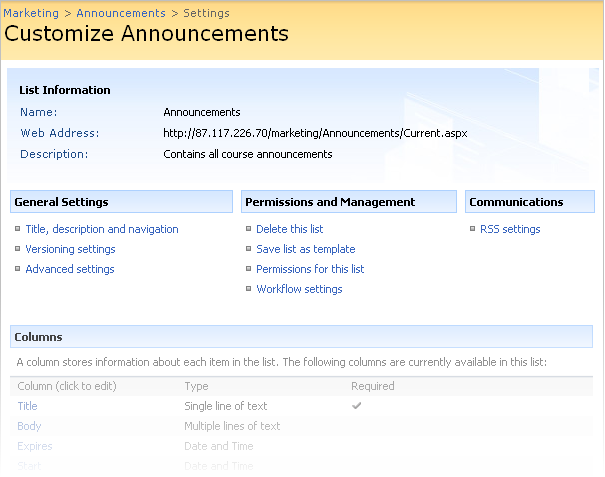
Fig. ‘Customizing List Settings’
The page is divided into several sections that allow you to modify:
§ General settings;
§ Permissions;
§ Communication settings;
§ Columns and fields included into the list;
§ Views used for the list.
For further details regarding the list settings, please refer to the SharePoint Services 3.0 help documentation.