A Quiz is a type of examination consisting of several questions. Quizzes can be used as intermediate or final tests in the learning process.
When adding a quiz, you need to specify general properties of a new quiz. Later on you will need to add quiz questions.
To create a new quiz and specify its properties:
1. Enter the necessary course and click the Quizzes icon in the left Tools menu. The system will display all quizzes, surveys and question pools for the given course.
2. Click the Create button at the header of the list. The Create page will appear.
3. In the Quiz section select Quiz ( ). The following Create Quiz form will appear:
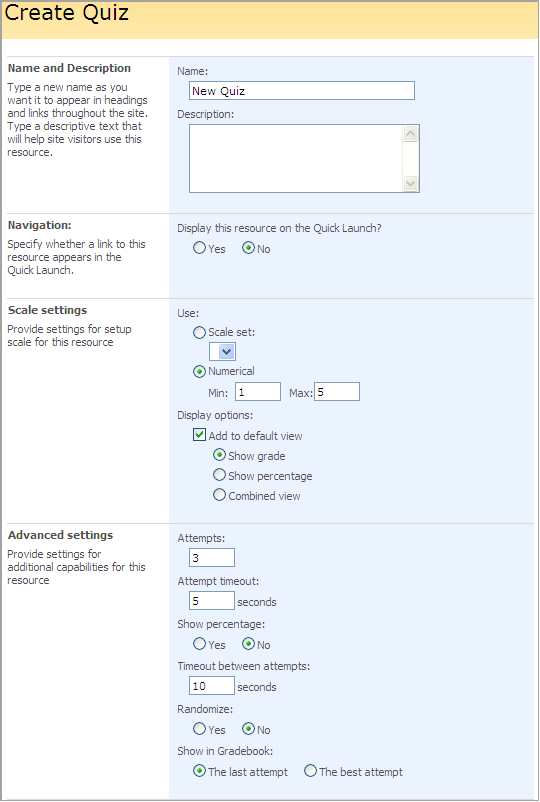
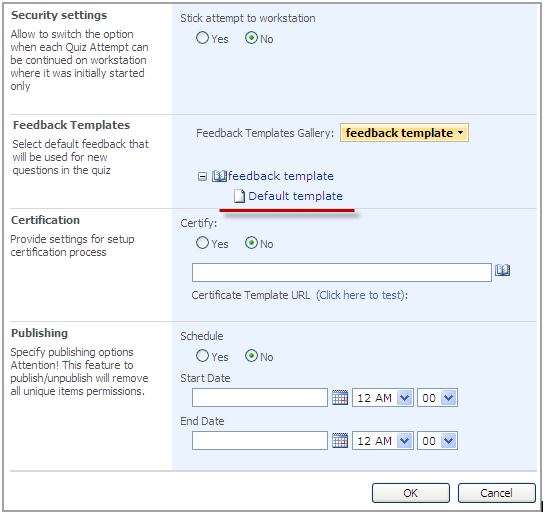
Fig. ‘Creating a quiz’
4. Fill out the form fields as described below:
- Name – enter the name of the created quiz;
- Description – type in the description of the quiz;
Navigation
- Select Yes to display a link to this Quiz on the Quick Launch;
Scale Settings
- Use:
a) Scale Set – from the drop-down list select the scale which should be applied to this Quiz or
b) Numerical - set your own values. To set a scale, refer to the Scale Templates topic.
- Display options – check the box if you want to add a scale to default view. Select the way the scale should be displayed;
Advanced Settings
- Attempts – enter the number of attempts allowed to pass the quiz.
- Attempt Timeout – you may specify time for which the quiz should be passed.
- Show percentage – select yes to display percent of right answers.
- Timeout between attempts – you may specify the time between every attempt.
- Randomize – select Yes to randomize questions in the quiz. Note that questions are randomized within a page only.
- Show in Grade Book – specify whether you want the last or the best attempt to display in the Grade Book section
Security settings
Stick attempt to workstation – select No if you want to allow users to resume the attempt from different computers. If you select Yes the attempt will be resumed only from the same workstation, where it was started. Technically the option will “stick the attempt” to browser cookies
|
NOTE: |
Browser option “Accept third party cookies” should be switched on to resume the attempt after you enable this quiz option. |
Feedback Templates
- If you select the feedback templates you’ll later see the Feedback settings option among the quiz settings list where you can define the positive/negative and semi-positive feedback for new questions. They will be used instead of each question’s feedback.
Click the Change button to select a list with templates. Before selecting a list, please refer to paragraph Creating Feedback Templates.
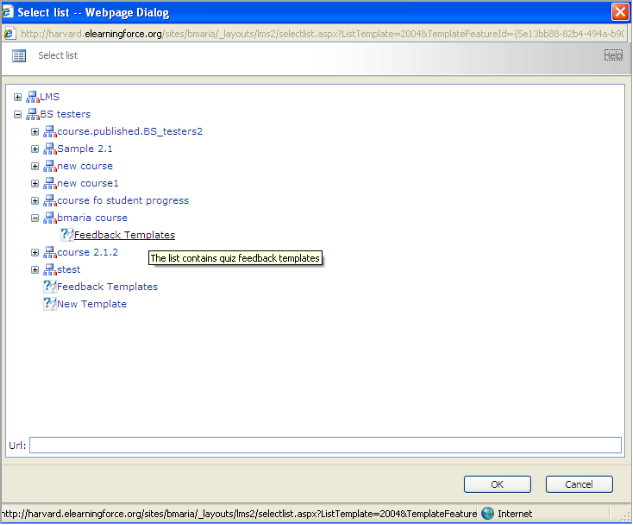
Fig. Selecting a Template List
Once available feedback templates appear on the page, click the necessary one (see picture Creating a Quiz). The template name will become bold. For more information about creating feedback messages templates, refer to paragraph Creating a Feedback Message Template.
If there are no default feedback message templates, see paragraph Creating a Custom Feedback Message.
Certification
- Certify – select Yes to enable certification for this quiz. Use the Browse button to select certificate template for the quiz. To create a certificate, refer to Certificate Templates.
Publishing
- Schedule – select Yes to schedule the quiz for a specific date and time,
- In the Start Date field enter the start date. From the drop-down lists select hour and minutes when the quiz be published.
- In the End Date enter the end date when publishing stops. Use the drop-down lists to specify end time.
When finished, press the OK button at the bottom of the form to save changes or Cancel to discard changes.